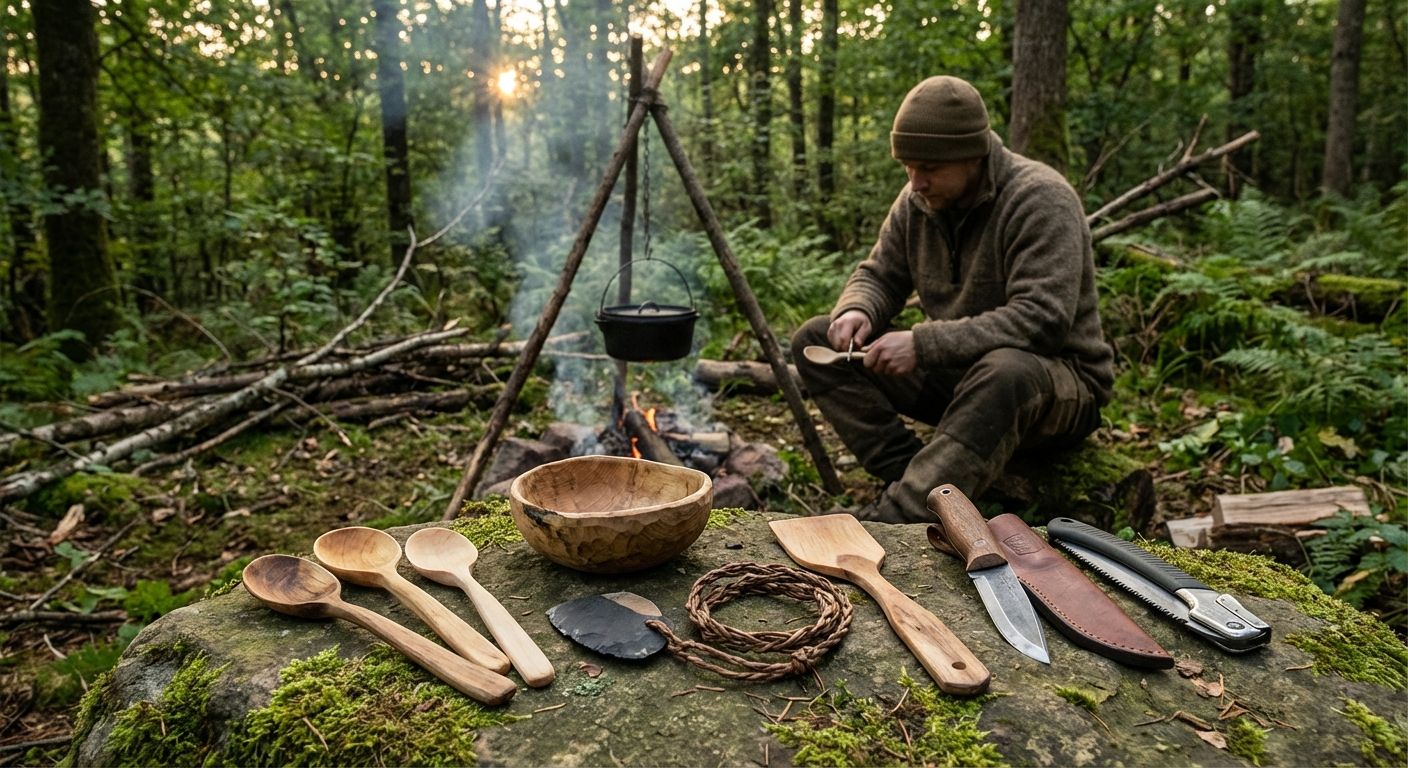
Improvised utensils are often the difference between discomfort and true self-reliance on the trail. In this guide you’ll learn practical, safe ways to craft useful utensils from natural materials—wood, stone, and vines—so you can prepare food, eat, cook and maintain hygiene even when modern gear is limited or lost.
Why learn to make improvised utensils?
Understanding how to create makeshift tools and utensils is a core bushcraft skill. Benefits include:
- Self-reliance: Reduce dependence on carried gear.
- Redundancy: Back up your kit with natural alternatives.
- Low weight: Rely on local materials instead of extra pack weight.
- Skill development: Strengthen woodcraft, firecraft and safe tool use.
Safety and ethical considerations
Before collecting materials, keep these priorities in mind:
- Safety first: Always prioritize personal safety—use gloves, control cutting movements, and maintain a safe distance from companions while working. If available, use a reliable folding or fixed blade knife rather than improvising dangerously.
- Leave no trace: Minimize impact—take only what you need, avoid cutting live trees where possible, and refrain from harvesting protected plants.
- Local laws and permissions: Some areas prohibit removal of natural materials—check regulations.
Core materials and how to select them
Choosing the right natural materials improves durability and usability. Key materials and selection tips:
- Wood: hardwoods like birch, oak, and maple for durable utensils; softer woods like cedar, basswood or willow for carving and spoons. Look for deadstanding (dry, standing dead wood) or recently fallen limbs rather than cutting living trees.
- Stone: Use fine-grained, hard stones (quartzite, basalt, flint) for scrapers, grinding surfaces, and primitive blades.
- Vines and cordage: Flexible vines (liana-types), inner bark fibers (basswood, cedar), and roots like cedar root make strong natural cordage when processed correctly.
- Bone and antler: If ethically obtained (from naturally deceased animals or with permission), bone can be shaped into hooks, awls, and scoops.
Basic tools to carry (recommended)
While this post focuses on natural materials, carrying a few small tools makes crafting safer and faster:
- A reliable bushcraft knife (fixed-blade or high-quality folding knife)
- A compact saw or folding saw
- Sharpening stone or file
- Small hatchet or hand axe (optional, for heavier work)
Step-by-step projects
1) Carving a wooden spoon
The spoon is one of the most versatile improvised utensils—for eating, stirring, and serving.
- Choose the blank: Select a straight, knot-free piece of hardwood or soft carving wood about 30–40 cm long and 3–5 cm thick. A branch or sapling section works well.
- Mark the shape: Outline a spoon bowl and handle on the wood. Keep the bowl shallow for strength.
- Remove bark and rough shape: Use a knife to strip bark and whittle the exterior. Make controlled, away-from-body cuts.
- Hollow the bowl: Carve into the center gradually. You can use a spoon knife (if available) or make a series of stop cuts and remove chips. Another technique is burning the bowl with hot coals (careful—follow safety rules) and scraping carbon away.
- Smooth and finish: Sand with abrasive stone or fine-grit natural sand, and if desired, apply a food-safe finish like heated animal fat, beeswax mixed with oil, or plant oil to seal the wood and improve water resistance.
2) Crafting a wooden cup or bowl
A cup or bowl allows boiling and serving. Use thicker hardwood for durability.
- Start with a larger log section. Hollow using controlled carving and grinding on a flat stone.
- Method options: scooping with a curved knife; burning and scraping; or creating a bowl by joining carved halves (advanced).
- Finish with natural seals as above to extend life and prevent cracking.
3) Stone utensils and tools
Stone can produce scrapers, grinding surfaces (metate), and crude knives:
- Scraper: Flake a flat edge on a fine-grained stone for scraping hides or cleaning food. Use percussion flaking with a hammerstone (exercise caution).
- Grinding stone: A flat stone and a smaller handstone make quick meal prep possible (grains, seeds).
- Stone ladle/serve scoop: If you find a porous soft stone, hollowing is possible but requires time and a good abrasive surface.
4) Cordage, bindings and handles
Reliable bindings are essential for combining natural parts into stable utensils.
- Making cordage: Strip inner bark fibers, twist and braid into cord. For strength, create a three-strand braid or use a reverse-twining method.
- Using bindings: Lash handles to stone blades with cordage; wrap handles with bark strips for comfort and grip.
5) Cooking implements: spatula, stirring paddle and tripod
With larger sticks you can craft paddles, spatulas and even a cooking tripod to hang pots above the fire.
- Spatula/paddle: Carve a flat edge on a stout stick; thin towards the tip to slide under food.
- Tripod: Use three forked poles lashed at the top and spread to form a stable tripod. Add a chain of vine or cord to hang pots.
Care, maintenance and hygiene
To ensure safety and longevity:
- Clean utensils: Wash with hot water and scrub with sand or abrasive stones. For hygiene, dry thoroughly and re-seal wooden surfaces when possible.
- Storage: Keep away from constant moisture; hang to dry or store under shelter to prevent rot.
- Regular inspection: Check for cracks or splinters; sand or re-carve uncomfortable areas.
Practical tips and troubleshooting
- When wood cracks: Use natural glue (pine pitch mixed with charcoal) to seal minor splits, or replace the item if structural integrity is compromised.
- Curing bowls/cups: Heat-treating (slow, gentle heat) can reduce moisture content and increase durability. Avoid overheating and charring.
- Speed vs. durability: Softer woods carve faster but wear quicker—choose based on intended use.
Further learning and trusted resources
Continue your education with reputable sources:
- NOLS (National Outdoor Leadership School) – courses and articles on bushcraft and wilderness skills.
- REI Expert Advice – practical survival overviews and safety guidelines.
- CDC – Emergency Preparedness – public health and safety considerations in outdoor emergencies.
Conclusion: building confidence with improvised utensils
Mastering the creation of improvised utensils from natural materials expands your adaptability and confidence in the outdoors. Start with small projects—like a spoon or spatula—practice safe carving and material selection, and gradually progress to more complex items like bowls, grinding tools and cooking tripods.
These skills are not only practical for emergencies but also enrich the outdoor experience, connecting you to traditional crafts and the environment. Always prioritize safety, ethical sourcing and local regulations while practicing bushcraft.
Ready to practice: Pick a softwood log, a sharp knife, and plan a simple spoon project the next time you go out—document your process and adjust techniques based on experience.