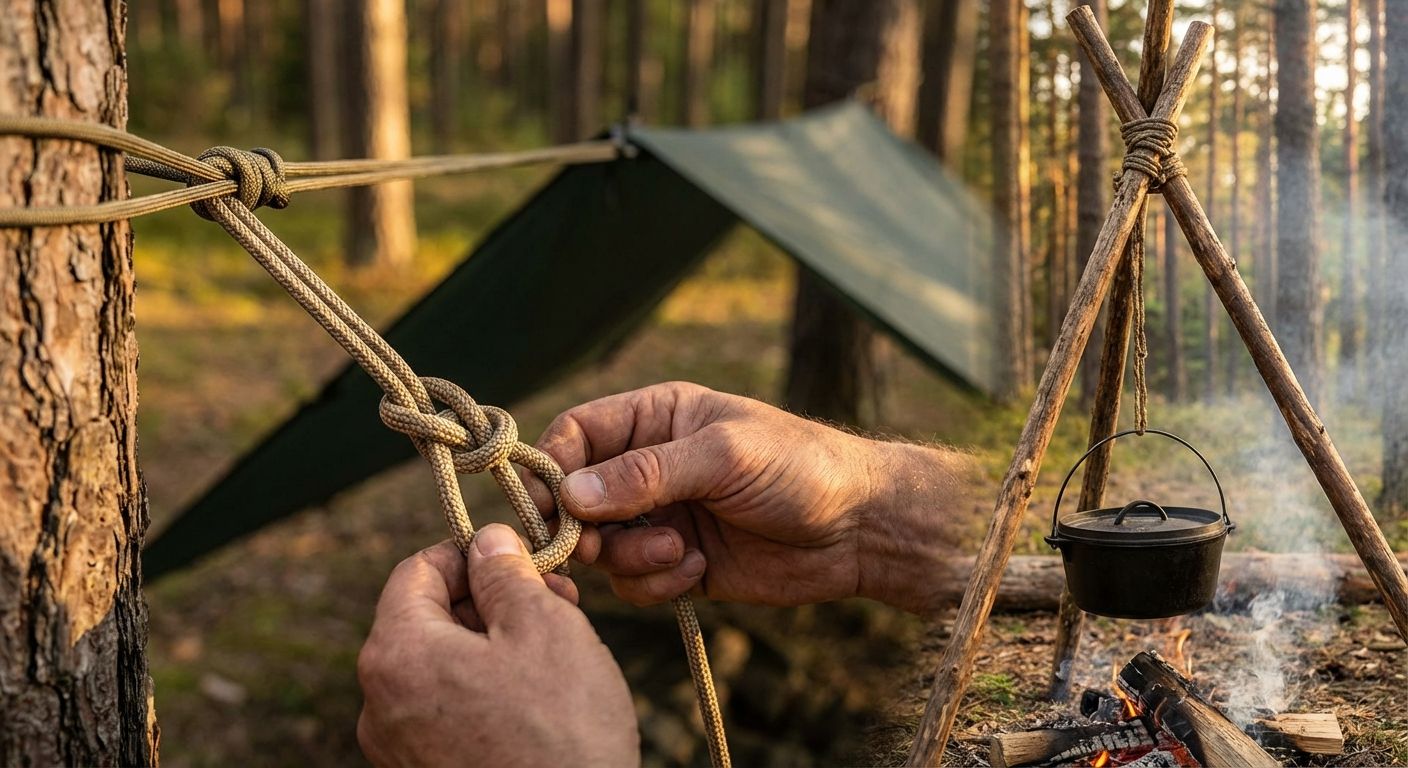
Knot-tying and lashing techniques for survival are essential skills for anyone who spends time in the outdoors. Whether you’re building a shelter, securing a load, or performing a rescue, the right knot or lashing can be the difference between a safe trip and a dangerous situation. This guide teaches practical knots, lashings, and decision-making strategies with step-by-step directions and safety tips.
Why knots and lashings matter
Knots are the building blocks of wilderness craft. They allow you to:
- Construct shelters that resist wind and rain
- Secure gear to packs, vehicles, or lines
- Perform rescues, stabilize patients, and make improvised stretchers
- Create tools like splints, tripods, and fishing rigs
Understanding knot-tying and lashing techniques for survival helps you choose the most effective method for each task and avoid common mistakes (slipping, jamming, or weakening rope fiber).
Essential equipment and rope selection
Before tying, pick the right cordage. Key considerations:
- Material: Natural (hemp, jute) is good for lashings but degrades; synthetic (nylon, polyester, paracord) is stronger and more durable.
- Diameter: Thin cord (paracord 550) is versatile for repairs and traps. Thicker rope (8–12 mm) is better for load-bearing tasks and shelter ridgelines.
- Stretch: Nylon stretches and can shock-load; polyester has low stretch—prefer polyester for static loads.
- Condition: Inspect for frays, UV damage, and contamination. Cut and fuse synthetic ends to prevent unraveling.
How to choose the right knot
Ask four questions before tying:
- Will the knot need to hold a static or dynamic load?
- Does it need to be easily untied after loading?
- Is the rope slippery or sticky?
- Are you working under tension or in tight spaces?
Use bowlines and figure-eight variants for secure, non-jamming loops; choose hitches like clove hitch or round turn and two half-hitches for quickly anchoring to posts; use trucker’s hitch for tensioning tarps and ridgelines.
Core knots and step-by-step instructions
The following knots cover the majority of survival needs. Practice them until each step is instinctive.
Bowline — secure loop that won’t jam
Use: anchor points, rescue harness (temporary), attaching ridgelines.
- Make a small loop in the standing part (the rabbit hole).
- Pass the working end up through the loop (the rabbit comes out).
- Wrap the end around the standing part (around the tree).
- Pass the end back down through the loop (rabbit goes back in) and snug up.
Pros: easy to untie after loading; Cons: can work loose if not under constant load—consider a Yosemite finish for security.
Figure-Eight Follow-Through — climbing-grade secure loop
Use: dependable loop for life-safety anchors, making sure the knot can’t slip.
- Make a figure-eight in the rope’s end.
- Thread the working end through your anchor point.
- Retrace the original figure-eight with the working end, following the path back.
- Tighten and dress the knot neatly.
Pros: strong and easy to inspect; Cons: bulkier than bowline.
Clove Hitch — quick anchor to a pole
Use: starting lashings, attaching guylines to poles or trees when tension is adjustable.
- Wrap the rope around the post once.
- Cross over and wrap a second time.
- Slip the working end under the second wrap and tighten.
Note: Clove hitch may slip under intermittent loads—add a half hitch or finish with a round turn and two half-hitches if needed.
Round Turn and Two Half-Hitches — stable anchor
Use: securing a line to a fixed point, good for tent guylines and tarp corners.
- Make a round turn around the anchor (wrap fully around once).
- Tie two half-hitches around the standing part.
- Tighten and dress neatly.
Trucker’s Hitch — create mechanical advantage for tension
Use: tensioning tarps, ridgelines, and securing loads.
- Create a loop (slip knot or alpine butterfly) in the standing part.
- Pass the working end around the anchor point.
- Thread the working end through the loop to form a pulley.
- Pull tight to create mechanical advantage and finish with two half-hitches or a figure-eight to secure.
Tip: Use gloves to protect hands and avoid sudden snap-backs.
Square Knot (Reef Knot) — for joining similar lines (use with caution)
Use: tying slings or simple bindings when lines are same diameter and non-critical loads. Do not use for life-safety or heavy loads—the knot can capsize.
- Right over left, then left over right.
- Tighten until the knot lies flat.
Sheet Bend — join two ropes of different diameters
- Make a bight in the thicker rope.
- Pass the thinner rope’s end through the bight, around both parts, and tuck under its own standing part.
- Tighten and dress properly.
Alpine Butterfly — fixed loop in the middle of a rope
Use: isolate a damaged section, create mid-line loops for hauling, or distribute load in three directions.
Munter Hitch — simple belay and friction control
Use: improvised belay, lowering, or friction brake with carabiner (learn proper technique and practice before use in rescue).
Lashings: building frames and tripods
Lashings bind poles into structural shapes for shelters, stretchers, or cooking tripods. Common lashings:
- Square lashing — binds two poles crossing at 90° (frames and A-frames).
- Diagonal lashing — used when poles are not tightly touching or for angled joins.
- Shear lashing — used to join two poles side-by-side to form longer spars or a scissor-like pivot (tripods).
Basic square lashing steps:
- Start with a clove hitch on one pole.
- Make several tight wraps around both poles crossing the X.
- Make several frapping turns between the poles to cinch tightly.
- Finish with a clove hitch on the opposite pole.
Practical applications and scenarios
Shelter construction
Use a strong ridgeline: a trucker’s hitch or a double bowline on each end will keep your tarp taut. Use square lashings to build frame supports and clove hitch plus two half-hitches for quick temporary anchors.
Securing gear
Use sheet bends when joining ropes, and trucker’s hitch for tensioning loads on a pack or roof. Always back up slippery knots with a stopper knot (overhand) or half hitch.
Rescue and first aid
For improvised stretchers and splints, combine lashings with structural poles. Use the figure-eight on a bight or bowline for controlled lifting; prefer figure-eight for life-safety. Learn proper belay and lowering technique—consult certified rescue training for high-angle scenarios (see external resources below).
Practice drills and learning plan
Consistency comes from repetition. A practice plan:
- Week 1: Bowline, figure-eight, and clove hitch — 10 reps each with different ropes.
- Week 2: Trucker’s hitch and round turn with two half-hitches — tension and release drills.
- Week 3: Lashings — build an A-frame and a tripod.
- Ongoing: timed assembly of a basic shelter and tying under simulated conditions (gloves, low light, wet rope).
Safety tips and common mistakes
- Dress your knots: make sure they are neat and tightened; loose, crossed strands reduce strength.
- Back up critical knots: a simple overhand backup prevents catastrophic slip.
- Avoid rope-on-rope wear: place padding or change contact points to reduce abrasion.
- Inspect rope regularly and retire if there are deep abrasions, core exposure, or chemical damage.
Quick reference: when to use which knot
- Non-jamming loop: Bowline
- Life-safety loop: Figure-eight follow-through
- Mid-line loop: Alpine butterfly
- Tensioning line: Trucker’s hitch
- Quick anchor to a post: Clove hitch
- Structural lashings: Square, diagonal, shear
Further learning and resources
Practice with credible resources and consider certified courses for rescue scenarios. Useful external references:
- REI’s knot guide — practical photos and usage tips.
- Scouting.org — classic knot and lashings curriculum.
- American Red Cross — wilderness first aid and emergency procedures.
Conclusion
Mastering knot-tying and lashing techniques for survival is about practice, material knowledge, and making smart choices under pressure. Start with the core knots, practice them in varied conditions, and combine knots and lashings into functional assemblies like shelters and rescue rigs. With repetition and attention to safety, these skills will become dependable tools in your outdoor kit.
Note: For any life-safety or technical rescue applications, seek professional training. This guide is practical for general wilderness use but does not replace certified rescue instruction.